How to install NeoForge on a Minecraft server


Summary 
NeoForge is a fork of Minecraft Forge, a foundational framework that enables players and developers to create and install mods that customize and enhance the Minecraft gameplay experience. By providing a structured and standardized way to modify the game, NeoForge empowers the community to develop a vast array of mods, from adding new features and mechanics to introducing new content such as items, blocks, creatures, and gameplay mechanics.

Note Access to installing NeoForge via the JAR Menu is limited to Premium servers or Budget servers with the BisectBoost. Alternatively, NeoForge can be installed manually by following the guide provided below.


How to Install NeoForge on a Minecraft Server (JAR Menu)
1. Log in to the BisectHosting Games panel

2. Stop the server.


3. Go to the Minecraft Jar tab.


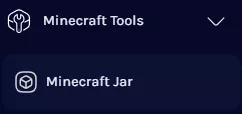
4. Select NeoForge on the left.


5. Next to the preferred version, click Install.
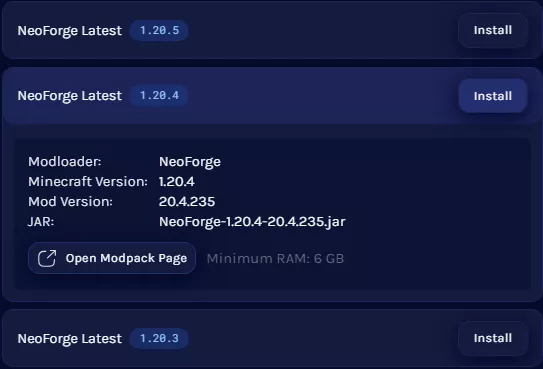

6. Press the Install button.


7. Choose what to do with the existing server files and click Next.
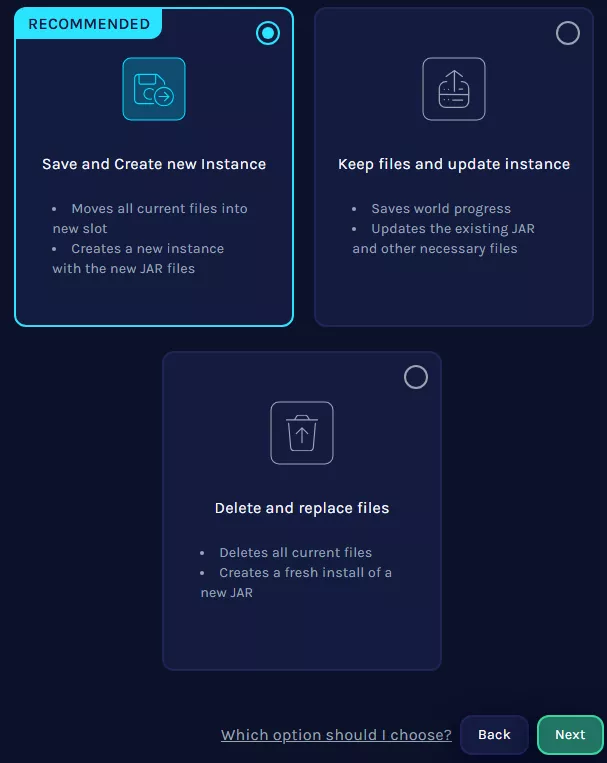


8. Start the server.


How to Install NeoForge on a Minecraft Server (Manual)
1. Download NeoForge.


2. Launch the NeoForge Installer and select Install Server.


3. Change the install location to a folder on the desktop.


4. Click OK.


5. Once finished, navigate to the folder on the desktop.


6. Select all files. Right-click and choose Send to>Compressed (zipped) folder.


7. Minimize the file to use later in the tutorial.

8. Log in to the Bisecthosting Games panel.

9. Stop the server.


10. Go to the Minecraft Jar tab.


11. Select Custom on the left.


12. Depending on the Minecraft version, click Install next to Custom NeoForge Java 17 or Custom NeoForge Java 21.


13. Press the Install button.


14. Choose what to do with the existing server files and click Next.


15. Go to the Files tab.


16. Upload the .zip file from Step 7.


17. Right-click on the .zip file and choose Unarchive.


18. Start the server.


Was this answer helpful?

3
« Back