Summary
Connecting to a Minecraft Bedrock server from consoles can offer players a unique and engaging gaming experience. Consoles such as the Nintendo Switch, Xbox and PlayStation allow players to connect to online servers and play with other players worldwide. Additionally, playing on a console can offer a different gameplay experience, as players may prefer using a controller rather than a keyboard and mouse. as well as gives players more accessibility as consoles are often connected to TVs and played from the comfort of a couch or a living room.
Note | Different consoles require different steps. Please follow the guide for the specific device being used. |
Note | The DNS settings changed allow the player to connect to BedrockConnect, allowing the console to connect to any server IP and a public DNS resolver. For more information, see: BedrockConnect | Public DNS Resolver (1.1.1.1) |
How to Connect to a Bedrock Server (Nintendo Switch)
1. From the Nintendo Switch menu, open the System Settings menu.
2. Scroll down to Internet and select Internet Settings.
3. Choose the network the device is connected to.
4. Choose Change Settings.
5. Scroll down to DNS Settings and switch it to Manual.
6. For the Primary DNS, use the following code: 104.238.130.180
.
7. For the Secondary DNS, use the following code: 1.1.1.1
.
8. Save the settings.
9. Open Minecraft Bedrock Edition and choose a profile to use.
10. Hit Play.
11. With the R and L buttons, scroll over to the Servers option.
12. On a server, select the Join Server button.
13. Once connected, choose the Connect to a Server option.
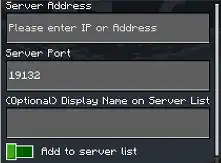
14. Fill in the fields.
Server Address - The address to connect to the server.
Server Port - The port to connect to the server.
Display Name on Server List - Set a name for the server. Optional.
Add to server list - Tick to have the server show up on the server list.
How to Connect to a Bedrock Server (PlayStation)
1. From the Playstation main menu, scroll over to the Settings icon.
2. Scroll down to the Network tab.
3. Go down to the Settings option.
4. Select the Set Up Internet Connection option.
5. On the connection that is currently being used, press the Options button on the Playstation controller and choose Advanced Settings.
6. Scroll down to DNS Settings.
7. Switch from Automatic to Manual.
8. For the Primary DNS, use the following code: 104.238.130.180
.
9. For the Secondary DNS, use the following code: 1.1.1.1
.
10. Select OK.
11. Open Minecraft Bedrock Edition.
12. Hit Play.
13. Scroll over with the RB and LB buttons to the Servers tab.
14. On a server, select the Join Server button.
15. Once connected, choose the Connect to a Server option.
16. Fill in the fields.
Server Address - The address to connect to the server.
Server Port - The port to connect to the server.
Display Name on Server List - Set a name for the server. Optional.
Add to server list - Tick to have the server show up on the server list.
How to Connect to a Bedrock Server (Xbox One)
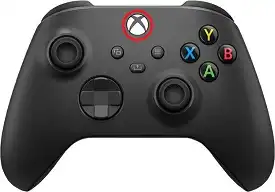
1. From the Xbox main menu, press the Xbox Button on the controller.
2. Use the RB and LB buttons to scroll over to the Profile tab.
3. Scroll down and select the Settings option.
4. From the General tab, choose Network Settings.
5. In the bottom right, select Advanced Settings.
6. Choose DNS Settings.
7. Switch from Automatic to Manual.
8. For the Primary DNS, use the following code: 104.238.130.180
.
9. For the Secondary DNS, use the following code: 1.1.1.1
.
10. Hit the Menu (or start) button to save the settings.
11. Restart the Xbox console.
12. Open Minecraft Bedrock Edition.
13. Hit Play.
14. Scroll over with the RB and LB buttons to the Servers tab.
15. On a server, select the Join Server button.
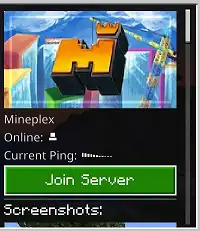
16. Once connected, choose the Connect to a Server option.
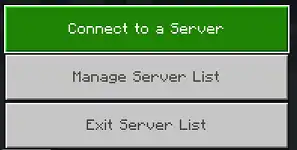
17. Fill in the fields.
Server Address - The address to connect to the server.
Server Port - The port to connect to the server.
Display Name on Server List - Set a name for the server. Optional.
Add to server list - Tick to have the server show up on the server list.