Summary
Installing a custom map on a DayZ server allows players to experience unique terrains, environments, and gameplay scenarios that differ from the standard maps. Custom maps enhance the gaming experience by introducing new challenges, exploration opportunities, and custom features tailored to player preferences. They also enable server administrators to create a more personalized and engaging community for players.
How to Install a Custom Map on a DayZ Server
1. Subscribe to the desired workshop map mod.![]()
2. Take note of the mod description to find <MissionName>.<TerrainName> server installation files.![]()
| Note | The Deer Isle is used in this example. |
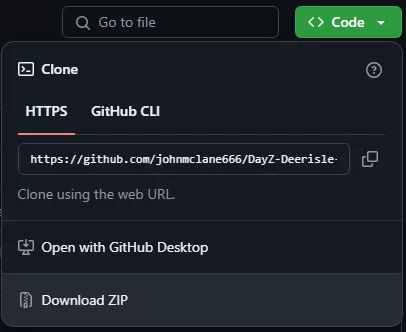
3. For GitHub Repositories, choose Download ZIP from the Code dropdown.
4. Unzip the downloaded file.![]()
5. Minimize the folder to use later in the tutorial.
6. Log in to the BisectHosting Games panel.
7. Stop the server.![]()
8. Go to the Files tab.![]()
9. Open the mpmissions folder.![]()
10. Upload the <MissionName>.<TerrainName> folder from Step 5. empty.deerisle is used in this example.
11. Return to the /home/container/ directory.![]()
12. Open the serverDZ.cfg file.![]()
13. Navigate to the class Missions line.
14. Next to template=, edit the <MissionName>.<TerrainName> to the name from Step 10.
15. Press the Save Content button.
16. Return to the /home/container/ directory.![]()
17. Upload the modlist.html file with the mod from Step 1. Learn how to here. 
18. Start the server.![]()

