Summary
Vote listeners on a Minecraft server are a plugin or script used by server owners to encourage player engagement through voting. By offering enticing rewards like exclusive items, gameplay advantages, and various perks, these systems aim to motivate users to cast favorable votes for the server on external platforms. The implementation process involves integrating the chosen vote listener tool into the server setup and configuring it based on the provided guidelines.
| Requirement |
| Nuvotifer must be installed on the server. Learn how to here. |
| Note |
There are several vote listener plugins available. SimpleVotes is used in this example. |
| Note |
Each vote listener has different configuration options. Check the plugin description for more information. |
How to Install a Vote Listener on a Minecraft Server
1. Download SimpleVotes.
2. Minimize the file to use later in the tutorial.
3. Log in to the BisectHosting Premium or Budget panel.
4. Stop the server.

5. Go to the File Manager tab.

6. Open the plugins folder.

7. Drag and drop the .jar file from step 2.

8. Start the server.

9. Once fully booted, stop the server.

10. Return to the File Manager tab.

11. Find the following directory: plugins/SimpleVotes .

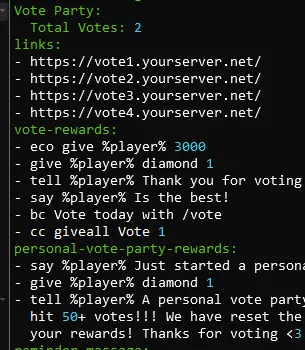
12. Open config.yml for editing.

13. Make the desired changes.

14. Choose the Save and close button on the lower right.

15. Start the server.

16. Go to the Console tab.

17. Run the following command to make a test vote: testvote [Username]


![]()


![]()
![]()

![]()


![]()

![]()

