Summary
Adding a Steam workshop collection to a Project Zomboid server is a great way to install many mods at once, and creating a collection is a great way to share mod setups with others. Collection IDs can be used on Project Zomboid servers to download mods in bulk and, if enabled, keep them updated automatically. This is an especially useful feature when playing with Custom Maps that involve other mods or when trying out popular mod packages played on other servers.
How to Add a Steam Workshop Collection to a Project Zomboid Server
1. From the Project Zomboid workshop page, go to Browse > Collections.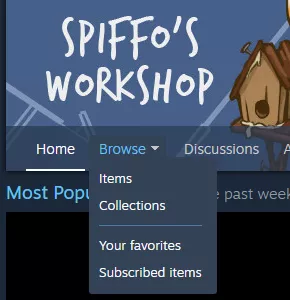
2. Create a collection with the Create Collection button or choose an already created one.![]()
| Note | Learn how to create a Steam Workshop Collection here. |
3. At the top of the window, click the Steam URL link to copy it.![]()
4. Log in to the BisectHosting Games panel.
5. Stop the server.![]()
6. Go to the Startup tab.![]()
7. Navigate to the Workshop Collection ID section, ensuring it is Toggled On.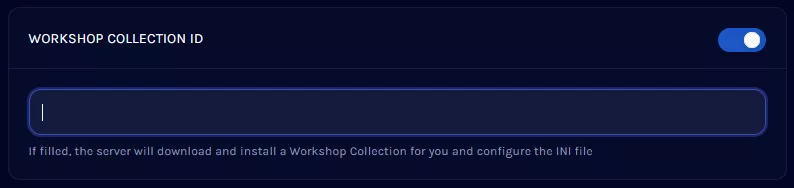
8. Paste the copied link and delete everything except for the numbers at the end.
| Note | Spawn regions (if used) need to be set manually, as not all mods require it. |
9. Start the server. The mod collection will start downloading.![]()

