
Welcome to potions and brews hosted by Bisect Wizarding School! Alchemy may seem quite daunting at first, but after learning how each item works, it’s as easy as taking a sip of suspicious stew. Ready your cauldrons and put on those witch hats because today we share our Minecraft 1.19 Potion Guide.
Preparatory Work
Step 1, Crafting the Brewing Stand
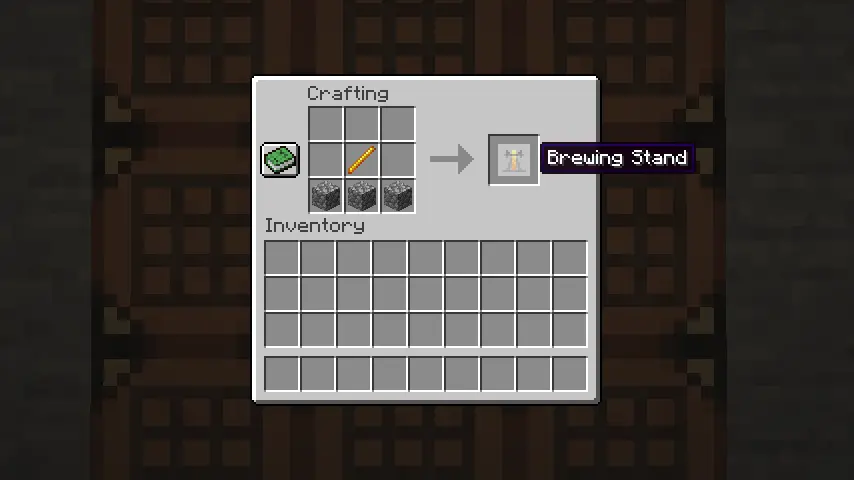
Before class can commence, a brewing stand is a must for every student. But where do we begin? Brewing stands require three cobblestone, or three of a cobble variant if preferred, and a single Blaze Rod. The cobblestone is obtained by breaking stone with a pickaxe, but the blaze rod will be a little more troublesome to get.
Students will need to venture forth into the nether and find a nether fortress where the mob called blazes spawn. They float about and shoot fire, so be ready with some ranged weapons and fire protection enchantments!
The blaze rods drop fairly quickly, but don’t leave with just one! You will need many as they also power the brewing and alchemy that’s about to be done. Try to get as many as possible, preferably with a looting enchanted sword if there is one on hand.
Once done, head back to your alchemy lab and place down your newly built brewing stand.
Step 2, Powering the Brewing Stand
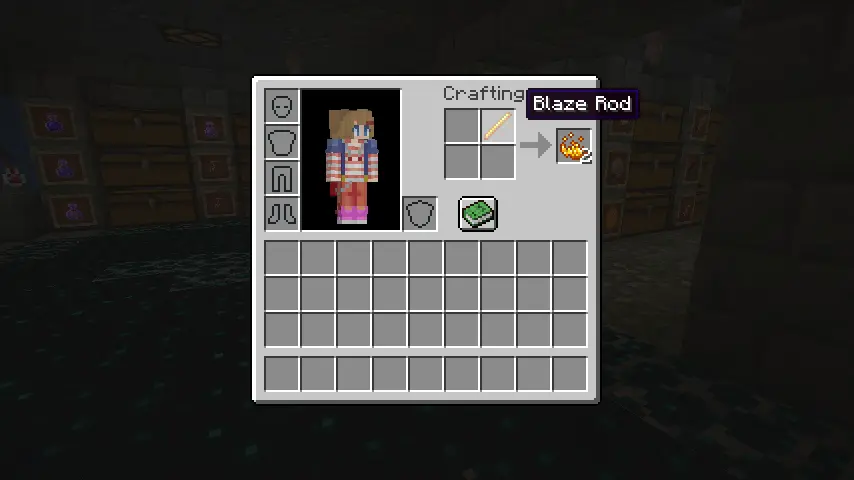
Similar to how a furnace is powered by coal, brewing stands are powered by blaze powder. An item you thankfully already have! Blaze powder is crafted by placing a single blaze rod on the crafting table. From there, put it right into your stand!
Step 3, Crafting Bottles
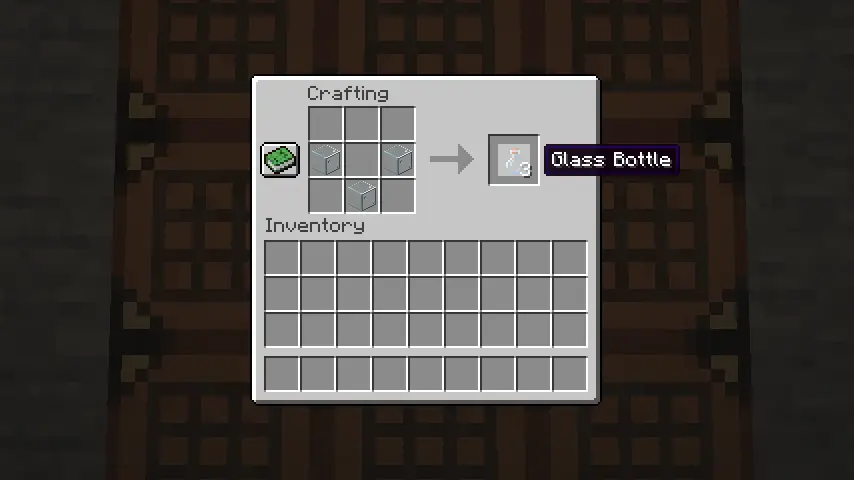
A potion can’t be made without something to put it in! Next, we need three glass blocks to craft bottles. A relatively simple task! Glass is obtained by digging some sand and putting it in a furnace. The sand will then smelt into glass!
Step 4, Preparing a Water Source
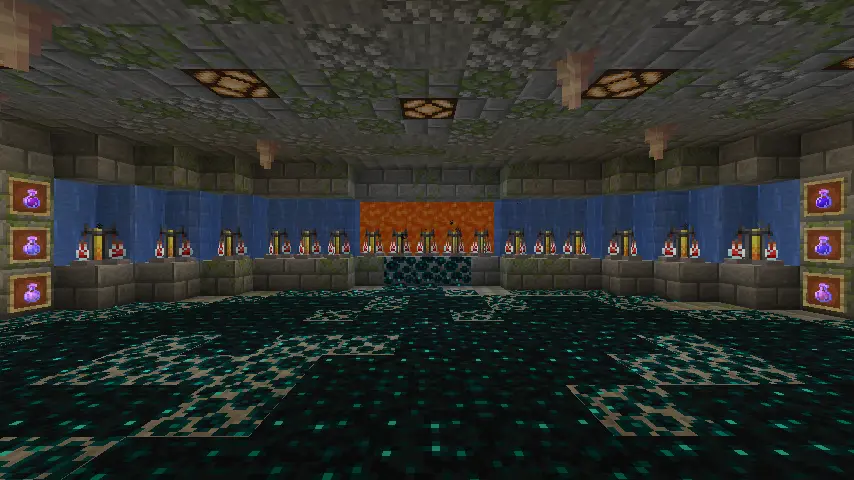
The final bit of preparation an aspiring alchemist needs is a water source to fill bottles with. Any water block will do, including cauldrons filled with water. I personally made some waterfalls in my brewing room. Its appearance, location, and amount are entirely up to you!
Potions and Brews 101
Step 1, Fill the Bottles with Water

Every potion begins with a bottle of water. Be sure to fill all three slots of the brewing stand! Making one or two potions at a time wastes resources and is never worth it. Always three!
Step 2, Awkward Potion

The first transformation at hand comes from placing a single nether wart in the brewing stand. This will turn the bottle of water into an awkward potion which is the root of all potions. I personally keep a chest full of awkward potions to skip having to do this step when brewing.
The only exception to this rule is when making Weakness Potions. These are made with a fermented spider eye which turns the bottle of water directly into a potion of weakness. But again, this is an exception. Everything else uses a nether wart at this stage.
Step 3, The Branching Tree
This is where brewing branches many which ways. So, for everyone’s ease, I made a table to help find what you need. Remember, this step will only work if three Awkward Potions are currently in the brewing stand!
| Ingredient | Outcome |
| Sugar | Potion of Swiftness |
| Rabbit’s Foot | Potion of Leaping |
| Blaze Powder | Potion of Strength |
| Glistering Melon | Potion of Healing |
| Spider Eye | Potion of Poison |
| Ghast Tear | Potion of Regeneration |
| Magma Cream | Potion of Fire Resistance |
| Pufferfish | Potion of Water Breathing |
| Golden Carrot | Potion of Night Vision |
| Turtle Shell | Potion of Turtle Master |
| Phantom Membrane | Potion of Slow Falling |
Step 4, Enhancing or Extending
Don’t remove those potions just yet! Potions can be extended or enhanced, but you can’t have both, so now a choice has come.
Enhanced potions will significantly increase the strength of a potion, but the time it lasts is shortened in exchange. Extended potions significantly increase the time a potion lasts, but the benefits it provides remain at rank one. Will you use glowstone dust to enhance the potion or redstone to make it last longer?
However, not all potions can be enhanced or extended. So, another table we shall provide!
| Potion | Glowstone Dust | Redstone |
| Potion of Swiftness | Potion of Swiftness II | Potion of Swiftness + |
| Potion of Leaping | Potion of Leaping II | Potion of Leaping + |
| Potion of Strength | Potion of Strength II | Potion of Strength + |
| Potion of Healing | Potion of Healing II | No Effect |
| Potion of Poison | Potion of Poison II | Potion of Poison + |
| Potion of Regeneration | Potion of Regeneration II | Potion of Regeneration + |
| Potion of Fire Resistance | No Effect | Potion of Fire Resistance + |
| Potion of Water Breathing | No Effect | Potion of Water Breathing + |
| Potion of Night Vision | No Effect | Potion of Night Vision + |
| Potion of Turtle Master | Potion of Turtle Master II | Potion of Turtle Master + |
| Potion of Slow Falling | No Effect | Potion of Slow Falling + |
Remember, a potion can not be enhanced and extended! It is one or the other!
Step 5, Corruption (Optional)
Some Potions can be corrupted, adding one final set of branches to our very large tree. Doing so will turn the potion into something else entirely. However, it usually follows the theme of opposites. A healing potion, for example, would become a harming potion.
Corruptions are done by putting a fermented spider eye in the brewing stand with three completed potions. Those already enhanced or extended will become their corresponding enhanced or extended variations.
| Potion | Fermented Spider Eye |
| Potion of Swiftness | Potion of Slowness |
| Potion of Leaping | Potion of Slowness |
| Potion of Strength | No Effect |
| Potion of Healing | Potion of Harming |
| Potion of Poison | Potion of Harming |
| Potion of Regeneration | No Effect |
| Potion of Fire Resistance | No Effect |
| Potion of Water Breathing | No Effect |
| Potion of Night Vision | Potion of Invisibility |
| Potion of Turtle Master | No Effect |
| Potion of Slow Falling | No Effect |
| Water Bottle | Potion of Weakness |
Combat Witchery 101
Step 1, Splash Potions

Every potion made so far can be turned into a splash potion by placing a single gunpowder in the brewing stand. Splash potions are weaker than drinking directly from the bottle, but they can be thrown, allowing multiple players to benefit while also skipping the drinking period.
However, the main benefit of splash potions is turning the negative potions into ranged weapons. This is especially strong in PVP environments.
Step 2, Lingering Potions

Taking splash potions one step further, they can be turned into lingering potions. This is done by placing a bottle of dragon’s breath in a brewing stand that contains three splash potions which then turns them into lingering potions.
When lingering potions are thrown, they leave a cloud on the ground causing negative or positive effects depending on the potion. For example, a lingering potion of harming will hurt people who enter the cloud, while a lingering potion of regeneration will heal them.
Dragon’s breath itself is obtained by right-clicking the Ender Dragon’s harmful breath with an empty glass bottle. It is the cloud of purple on the ground that hurts a lot during the fight!
Step 3, Tipped Arrows
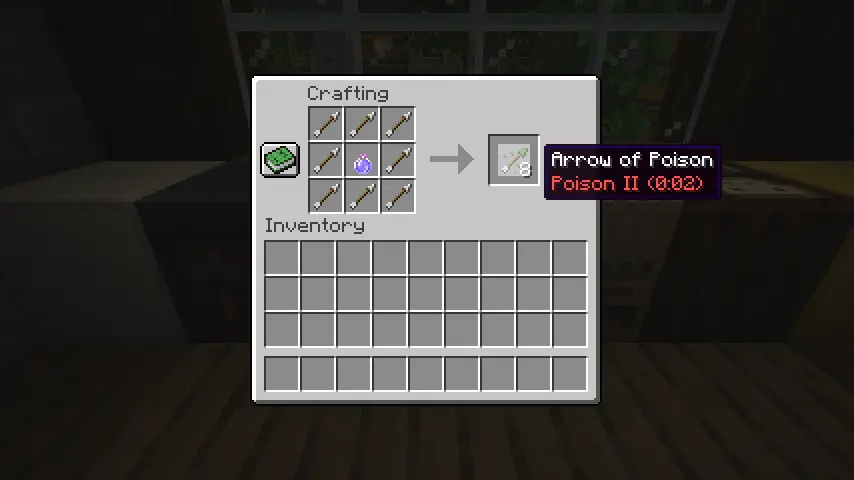
Finally, lingering potions can be transformed once more, but this time it is not done in a brewing stand. If a lingering potion is placed on a crafting table surrounded by eight arrows, tipped arrows can be made, which inflict the potion’s effect upon landing a hit. This is particularly deadly in PVP when using poison and harming arrows!
However, it is always funny to shoot your friend with an arrow of healing.
Minecraft 1.19 Potion Guide
Congratulations! You’ve made it all the way through potions and brews hosted by Bisect Wizarding School! We hope this invisible diploma will do. Didn’t receive it? What do you mean? Its right next to you!
Until Next Time,
Subscribe for the latest updates on all things gaming!
How would you rate this blog?


Relevant Blogs

GET THE INSIDE SCOOP!
Join our email for updates on our hosted games, company news and exclusive deals. Stay in the loop!
